

Rentals
Adding A Rented Stall To Your Account
Step 1: Before You Begin
Before you start, confirm that you have:
- A stable internet connection on your mobile device
- Registered with Wellington International to rent a Stall Monitor
- Received an invite email from Wellington International to access the rented stall
Step 2: Open Your Email
Navigate to your email inbox and open the invitation from Horcery. Double check the stall number that you have received access for is correct and click Accept Invite to get started.
Tip: If you don’t see the email in your inbox, check your junk or spam folder for the email.
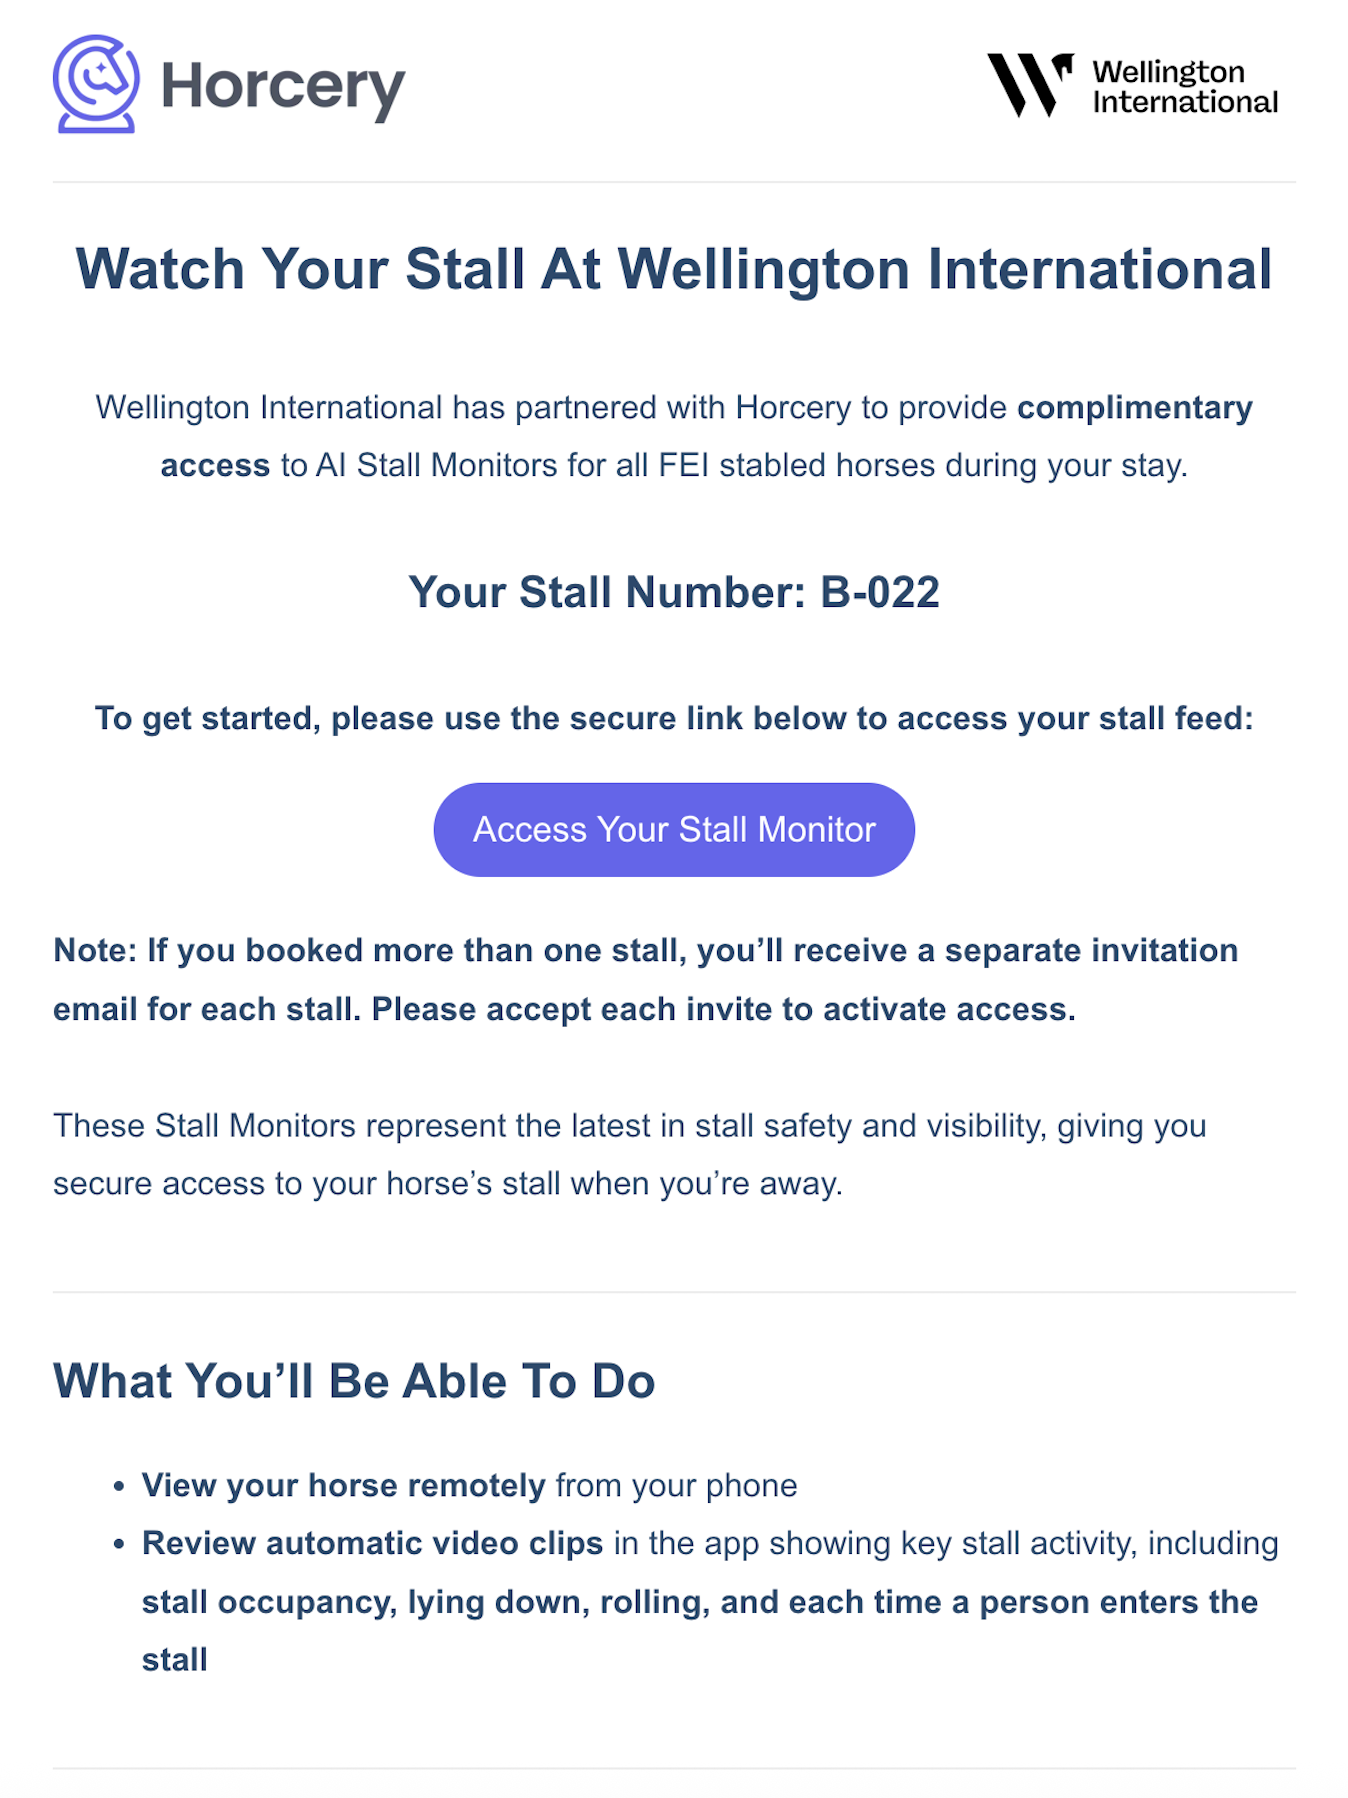
If you have not received an email granting you access:
All emails are automatically sent through Showgrounds live to addresses registered under your booking. Please visit the Stabling office if you require another email to be added.
Step 3: Create or Sign In to Your Horcery Account
You will be redirected to the screen shown below where you will be prompted to log into your Horcery account.
If you do not have an account:
Make sure that you sign up using the same email address that received the invitation.

Welcome
Password

Remember Me
Forgot Password?


Sign In
or


Don’t have an account yet? Sign up

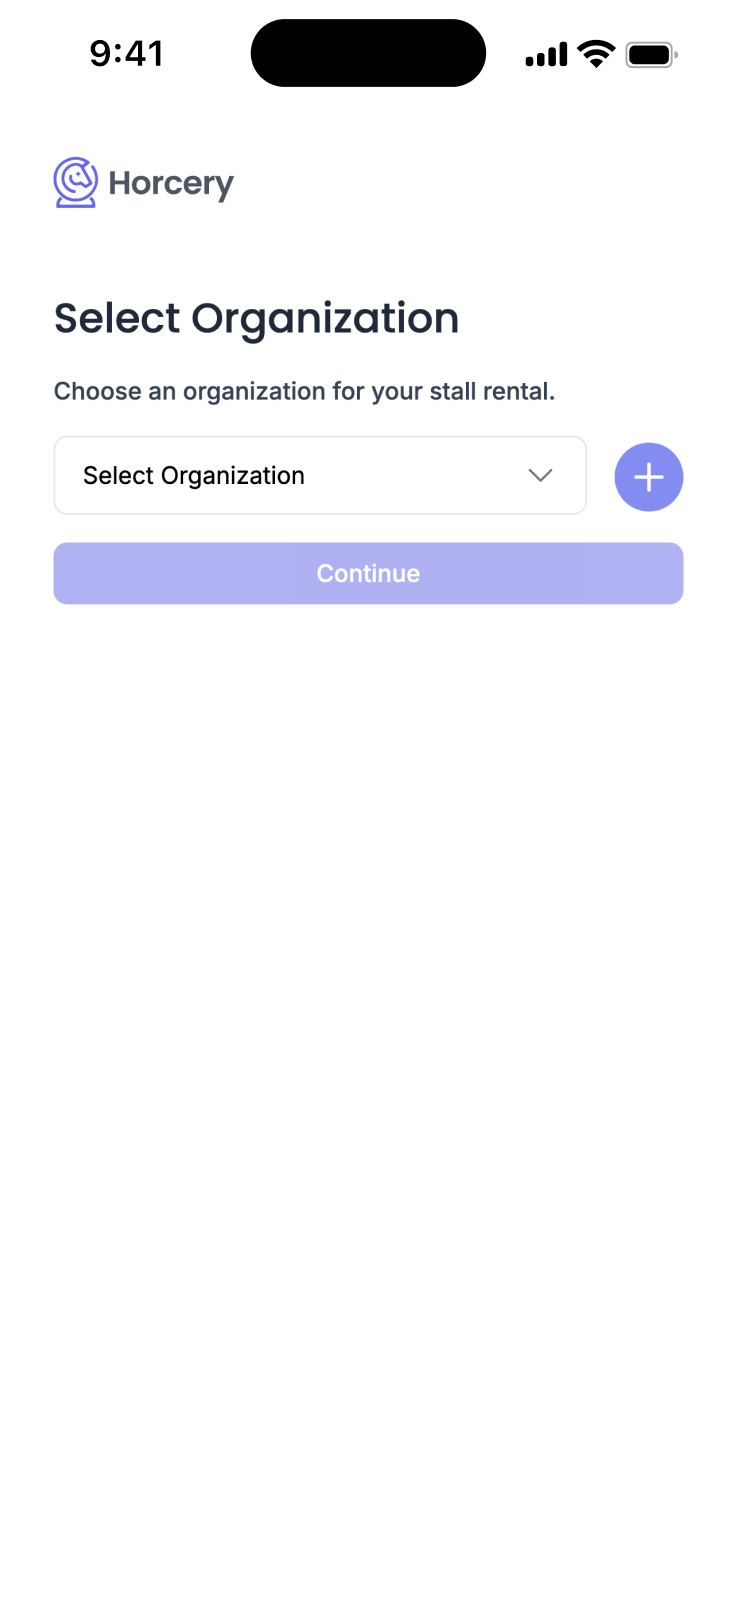
Step 4: Select an Organization
Once you are logged in, you will be redirected to the Select Organization screen. Click the dropdown to see a list of all organizations that you have access to. Select whichever one you would like to add your newly rented stall into.
If you do not have any organizations on this account, you can hit the + button to create a new one.
Then, hit Continue.
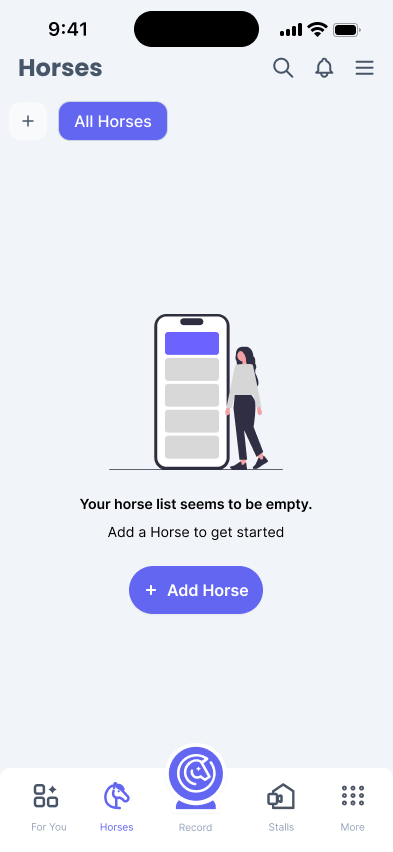
Step 4: Open the Horcery Mobile App
You’re all set to view your rented stall feed now! Navigate to the Horcery mobile app to view your new stall. If you do not already have the Horcery app installed, you can download it from the App Store or Play Store.

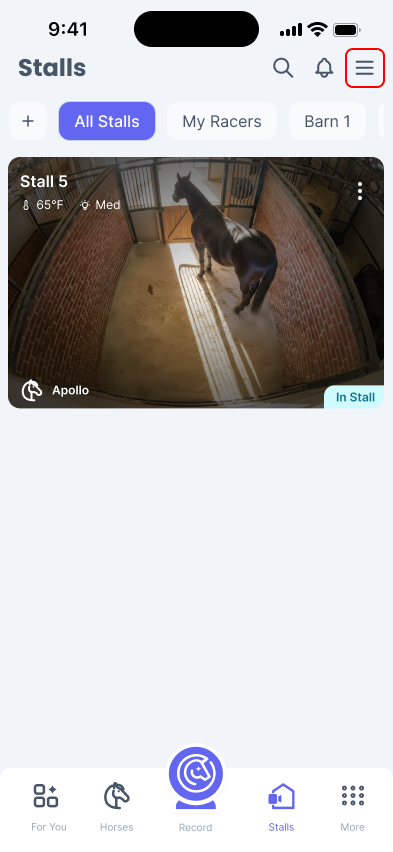
Step 5: Navigate to the Stalls Tab
Click the Stalls tab on the bottom navigation bar to view all Stall Monitors associated with your account. Your newly rented stall should be visible here.
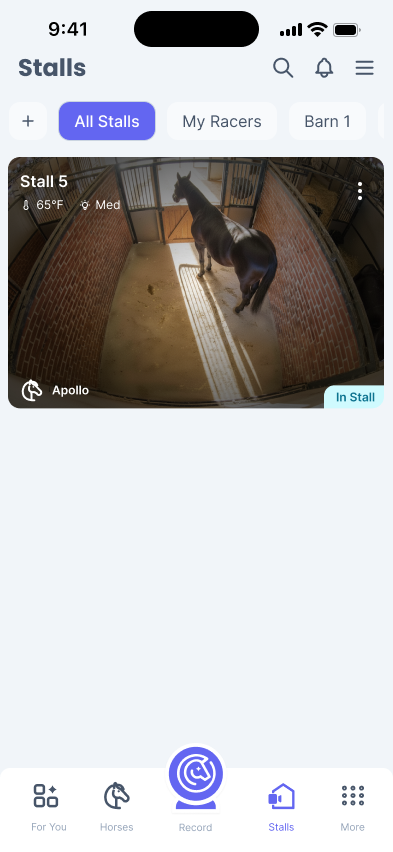
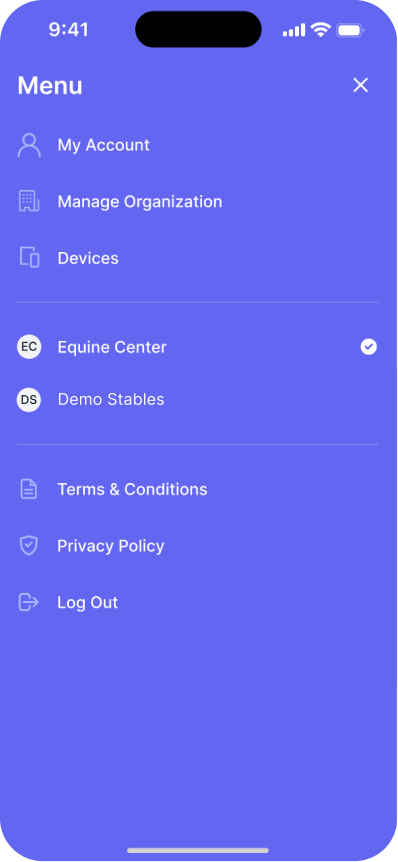
If you’re not able to find the new stall feed, you may be in the wrong organization. Click the menu button on the top right corner of your app and switch to the organization that you added your horse to.

Step 6: Add A Horse
Once you have access to the rented stall video stream, we recommend adding and assigning a horse to the stall. If you’re not sure how to do this, you can follow our step-by-step guide to do so.
Step 7: Repeat Next Stall
If you are renting more than one stall, you will receive a separate invitation email for each stall. Repeat steps 2 to 6 to activate access for each stall.
Need further assistance? Call our support hotline at (407) 890-7101 or email us at [email protected]

